
A first-time founder launches a candle brand. She has never ordered packaging before. She does not know what a folding carton is, what MOQ means, or how to send artwork to a factory. Six months later, her candles sit on the shelves of three boutiques, and customers regularly post unboxing photos on Instagram. The difference between launch and success was not money — it was knowing the right questions to ask, the right suppliers to talk to, and the right packaging choices that made her brand look established from day one.
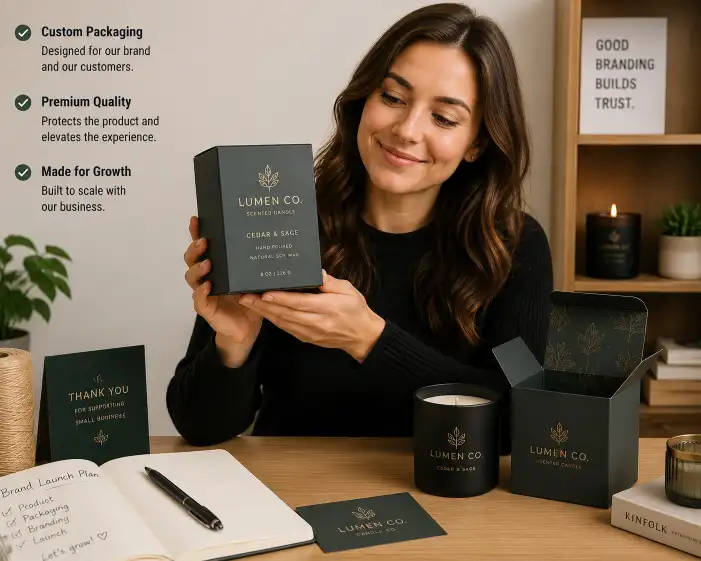
Startups can get professional custom packaging without a design team, without industry connections, and without ordering thousands of units. The key is knowing where to find startup-friendly suppliers, how to prepare print-ready artwork using free tools, which box types work at low quantities, and how to build a packaging strategy that grows with your brand — from a first batch of 300 units to retail-ready volumes.
The Leader Giftspack Team has worked with hundreds of startups and emerging brands over 16 years of manufacturing custom packaging. This guide covers what first-time founders actually need to know — how to find suppliers that accept small orders, how to create packaging designs without hiring an agency, which box type matches your product stage, how to handle your first production run, and how to plan for packaging upgrades as your brand grows.
The Startup Packaging Challenge — You Do Not Know What You Do Not Know
First-time founders face a specific set of challenges that established businesses do not. These are not about budget — they are about knowledge gaps, industry access, and process unfamiliarity.
What Makes Packaging Different for Startups
| Challenge | Why It Is Hard for Startups | What Experienced Brands Take for Granted |
|---|---|---|
| Finding the right supplier | No industry connections, no referral network | Existing supplier relationships, annual contracts |
| Understanding packaging terminology | Terms like "die line," "CMYK," "bleed," "SBS" are unfamiliar | In-house packaging engineers speak the language |
| Creating print-ready artwork | No design team, no experience with print specifications | Dedicated graphic designers who know print standards |
| Knowing what box type fits | No experience with different box structures, materials | Years of testing different packaging formats |
| Managing the production process | No familiarity with timelines, samples, approvals | Established SOPs for packaging procurement |
| Evaluating quality | No frame of reference for good vs. poor print quality | Quality control checklists, defect tolerance standards |
The Real Startup Advantage
While startups lack experience, they have structural advantages that established brands envy:
| Advantage | What It Means |
|---|---|
| No legacy packaging | You design fresh — no rebranding cost, no old inventory to write off |
| Iteration freedom | Change designs between batches without corporate approval chains |
| Small-batch testing | Order 200–300 units, test the market, iterate before scaling |
| Direct customer feedback | Every package is a test — social media comments tell you what works |
| Story-driven branding | Startup origin stories resonate with customers more than corporate polish |
Finding Suppliers That Work with Startups
The biggest roadblock for first-time founders is not design or budget — it is finding a supplier willing to accept a 300-unit order. Many packaging factories set MOQs of 1,000–5,000 units because that is where their production lines are profitable.
Supplier Types and Their Startup-Friendliness
| Supplier Type | Typical MOQ | Startup Friendly? | Best For | Trade-Off |
|---|---|---|---|---|
| Large-scale packaging manufacturer | 3,000–10,000 units | ❌ | Established brands with volume | Low per-unit cost, but too high MOQ for startups |
| Mid-size factory with digital press | 500–1,000 units | ⚠️ | Growth-stage startups | Better pricing than small shops, but MOQ still challenging |
| Small-batch specialist | 100–500 units | ✅ | First-time founders | Higher per-unit cost, but MOQ works |
| Online custom packaging platform | 1–50 units (samples), 100+ (production) | ✅ | Any startup | Easy ordering, template-based, higher per-unit cost |
| Trade sourcing platform (Alibaba, etc.) | 200–1,000 units | ⚠️ | Founders willing to vet suppliers | Lower cost, but requires due diligence, longer shipping |
Red Flags When Evaluating Suppliers
| Red Flag | Why It Is Dangerous | What to Do Instead |
|---|---|---|
| No sample policy | If they will not send a sample, they are hiding quality issues | Only work with suppliers who offer paid samples |
| Vague pricing | "It depends" without specifics means surprises later | Get itemized quotes with all fees listed |
| Refuses digital printing | Pushing only offset at low volumes means higher cost | Find a supplier with digital printing capability |
| No artwork review | Skips the step where print errors are caught | Work with suppliers that provide artwork proofing |
| Extremely low pricing | Below-market pricing often means poor materials or rushed work | Compare 3+ quotes to understand the market range |
| No communication | Slow responses during quoting = worse during production | Test responsiveness before placing an order |
Questions to Ask Before Choosing a Supplier
- What is your minimum order quantity for [your box type]?
- Do you offer digital printing for small batches?
- Can you send a sample of a similar product you have made?
- What file formats do you require for artwork?
- Do you provide a die-line template for my box size?
- What is the lead time from artwork approval to shipment?
- Do you offer pre-production samples before full production?
- Is the sample cost deducted from the production order?
- Do you inspect the boxes before shipping?
- Can you scale up when I need larger quantities later?
For more detail on the sample process, see our custom packaging samples guide.
Designing Packaging When You Have No Design Team
Most startup founders are not graphic designers. Packaging design requires specific knowledge — bleed zones, safe areas, CMYK color mode, die lines, resolution requirements. Here is how to get it right without hiring an agency.
Option 1: Use the Supplier's Design Service
Many packaging suppliers offer in-house design or art preparation services that cost far less than hiring a freelance designer.
| Service | Typical Cost | What You Get | Best For |
|---|---|---|---|
| Die-line template | Free | Technical template showing cut lines, fold lines, bleed | Founders who have artwork but need technical specs |
| Artwork adjustment | $20–$80 | Fixing color mode, resolution, bleed issues | Founders who designed it themselves but need technical cleanup |
| Full box design | $100–$400 | Complete design from brief to print-ready file | Founders who have no design at all |
| 3D mockup rendering | $30–$100 | Digital preview of the box before production | Any founder — see how your design looks in 3D before ordering |
Option 2: Use Free or Low-Cost Design Tools
| Tool | Cost | Best For | Limitations |
|---|---|---|---|
| Canva | Free / $12.99 pro | Simple box face designs, brand assets | Limited print-specific features, no die-line support |
| Adobe Express | Free / $9.99 premium | Template-based packaging design | Limited customization compared to Illustrator |
| GIMP | Free | Photo editing, texture creation | Steep learning curve, no vector support |
| Inkscape | Free | Vector design, die-line creation | Requires learning vector design basics |
| Packhelp Designer | Free (platform) | Built-in packaging templates, 3D preview | Only works with Packhelp-manufactured boxes |
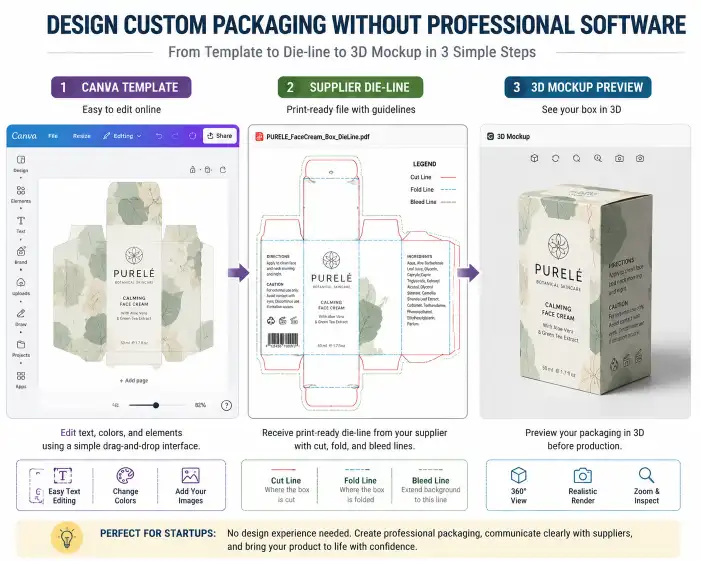
Critical Design Specifications — Do Not Skip These
| Specification | What It Means | Why It Matters | Common Mistake |
|---|---|---|---|
| CMYK color mode | Colors defined for print, not screen | RGB colors print dull or shifted | Designing in RGB and wondering why colors look wrong |
| 300 DPI resolution | Image resolution for print | Low-res images look pixelated | Using 72 DPI web images on packaging |
| Bleed area | Extra 3mm artwork beyond cut line | Prevents white edges after cutting | Artwork stops at cut line, leaving white borders |
| Safe zone | 3–5mm inside cut line for important content | Text or logos get cut off if too close to edge | Placing text at the edge of the box |
| Die line | Technical line showing where to cut/fold | Wrong die line = wrong box shape | Using a die line from a different box size |
| Spot colors | Specific Pantone colors for brand consistency | Brand colors reproduce exactly | Relying on CMYK to match a specific brand color |
The DIY Design Workflow
- Ask your supplier for a die-line template in Adobe Illustrator (.ai) or PDF format
- Open the template in Canva (import PDF) or Inkscape (import .ai)
- Design within the safe zone — keep all text and logos 3–5mm away from cut lines
- Use CMYK color mode — convert if your tool supports it
- Export at 300 DPI as a high-resolution PDF with bleeds
- Ask your supplier to review the file before production — most will catch issues for free
- Request a digital proof to see how the design looks on the box structure
Choosing the Right Box Type for Your Product
The box type you choose affects everything — brand perception, shipping, storage, and customer experience. Here is how to match your product and stage to the right box.
Box Type Decision Framework
| Your Situation | Recommended Box Type | Why |
|---|---|---|
| First product launch, testing demand | Folding carton, digital print | Low MOQ, lowest risk, professional appearance |
| Selling on Etsy or Shopify (direct to consumer) | Folding carton or corrugated mailer | Ships flat, easy to store, lightweight for shipping |
| Product priced over $50, brand positioning matters | Folding carton with lamination OR simple rigid box | Matte lamination on a carton often looks as premium as a budget rigid box |
| Eco-friendly brand positioning | Kraft folding carton, no lamination | Natural aesthetic, lower cost, sustainability story |
| Subscription box or recurring delivery | Branded corrugated mailer | Durable, lightweight, ships in its own packaging |
| Gift product given to someone else | Rigid box with magnetic closure | Gift recipients expect a premium presentation |
| Products going into retail stores | Folding carton with barcode and display-friendly design | Retailers need stackable, scannable, shelf-ready packaging |
Box Type Comparison
| Box Type | MOQ Range | Professional Look | Protection Level | Ships Flat? | Best For |
|---|---|---|---|---|---|
| Folding carton (standard) | 100–500 | ★★★★☆ | ★★★☆☆ | Yes — ships flat | 80% of consumer products |
| Folding carton with window | 200–500 | ★★★★☆ | ★★★☆☆ | Yes | Food, cosmetics (show product) |
| Folding carton with insert | 300–500 | ★★★★★ | ★★★★★ | Yes | Electronics, fragile items |
| Corrugated mailer | 100–500 | ★★★☆☆ | ★★★★★ | Yes — ships flat | E-commerce, subscription boxes |
| Rigid box (simple) | 200–500 | ★★★★★ | ★★★★☆ | No — ships assembled | Premium gifts, jewelry |
| Rigid box with magnetic closure | 300–500 | ★★★★★ | ★★★★☆ | No | Luxury products, gift-ready |
| Paper bag | 200–500 | ★★★☆☆ | ★★☆☆☆ | Yes — flat | Retail packaging, takeaway |
| Custom insert (foam, paperboard) | 200–500 | ★★★★★ | ★★★★★ | Varies | High-value products needing protection |
Why Folding Cartons Win for First Orders
Folding cartons are the default choice for startup packaging for specific practical reasons:
- They ship flat — 300 assembled rigid boxes take up a full closet. 300 flat folding cartons stack in a single box under your desk.
- They print digitally — No plate costs, no minimum, full color at 300 units.
- They are structurally flexible — One folding carton design can work across multiple product sizes with simple dimension changes.
- They upgrade naturally — A folding carton with matte lamination and foil stamping rivals a rigid box in perceived value.
- They integrate with inserts — A simple foam or cardboard insert inside a folding carton provides the same protection and unboxing experience as a rigid box.
For a deeper look at box types, see our folding box guide and rigid box guide.
The First Production Run — Step by Step
For a founder who has never ordered custom packaging, the production process can feel opaque. Here is exactly what happens, from first contact to box in hand.
The Production Timeline
| Week | Step | What Happens | What You Do |
|---|---|---|---|
| Week 1 | Inquiry & quoting | Send specifications (box type, dimensions, quantity, product details) to 3–5 suppliers | Compare quotes, ask questions, check responsiveness |
| Week 1–2 | Supplier selection | Choose the best fit based on MOQ, pricing, communication, and sample availability | Request a stock sample to evaluate material quality |
| Week 2–3 | Die-line & artwork | Supplier sends die-line template; you prepare print-ready artwork | Design within the die-line, send for review |
| Week 3–4 | Digital proof | Supplier creates a digital mockup showing how the box will look | Review colors, alignment, text — approve or request changes |
| Week 4–5 | Pre-production sample | Supplier produces 1–5 physical samples of your actual box | Inspect using the checklist below — approve or request revisions |
| Week 5–7 | Production | Factory runs full production | Wait — no action needed, but stay available for questions |
| Week 7–8 | Quality check | Supplier inspects boxes before shipping | Request photos or video of finished boxes; approve shipment |
| Week 8–9 | Shipping | Boxes arrive via air (5–10 days) or sea (4–6 weeks) | Unpack, inspect, store flat until ready to use |
The 10-Point Sample Inspection Checklist
When your pre-production sample arrives, check every item on this list before approving production:
| # | Check Item | Pass/Fail | What to Look For |
|---|---|---|---|
| 1 | Product fit | Does your product fit inside correctly? Not too tight, not swimming | Place your product inside, close the box, shake gently |
| 2 | Print color accuracy | Do the printed colors match your brand guidelines? | Compare against your original design file under daylight |
| 3 | Print registration | Are all colors aligned correctly? No misalignment or blur | Inspect edges where two colors meet — no white gaps |
| 4 | Text readability | Is all text crisp and legible? | Read every word, especially small text like ingredients or barcode numbers |
| 5 | Box structure | Does the box fold correctly? Do all flaps align? | Fold and unfold 3–5 times; check for cracking at fold lines |
| 6 | Material quality | Does the paperboard feel right? No visible defects | Check for scratches, dents, warping, or uneven surfaces |
| 7 | Finishing quality | Is the lamination or coating even? No bubbles or peeling | Run your finger across the surface — it should feel smooth and uniform |
| 8 | Die-cut accuracy | Are all cut lines clean? No ragged edges | Inspect edges under good light; run your finger along cut lines |
| 9 | Glue or assembly | Do glued areas hold securely? No excess glue marks | If seal-end or auto-lock bottom, test the glue strength |
| 10 | Overall impression | Does the box look like you imagined? Would you be proud to receive it? | Trust your gut — if something feels off, it probably is |
Common First-Time Production Problems and Fixes
| Problem | Why It Happens | How to Fix It |
|---|---|---|
| Colors look different from the design | Screen (RGB) vs print (CMYK) mismatch | Always design in CMYK; request a physical sample before production |
| Text is too close to the edge and gets cut off | Content placed outside the safe zone | Keep all text 3–5mm inside the cut line |
| Box does not close properly | Wrong dimensions or tolerance not accounted for | Add 1–2mm tolerance to your dimensions; test with product inside |
| Print looks blurry or pixelated | Low-resolution images (72 DPI instead of 300 DPI) | Use only 300 DPI images for print |
| Lamination has bubbles or peeling | Poor application during manufacturing | Reject the batch; request rework |
| Boxes smell like chemicals | Low-quality inks or coatings | Ask about VOC-free, food-safe materials before production |
For more on the ordering process, see our custom packaging quote guide.
Making Your Packaging Tell a Brand Story
Packaging is not just a container — it is your brand's first physical interaction with a customer. For startups, this is especially powerful because the founder's story is often the brand's story.
Storytelling Elements You Can Add Without Spending More
| Element | Cost | How It Tells Your Story |
|---|---|---|
| Thank-you card | $0.03–$0.08 each | Personal message from the founder — highest emotional impact per dollar |
| Custom tissue paper | $0.05–$0.08 per sheet | Your brand name, colors, or a simple pattern during unboxing |
| Sticker or seal | $0.02–$0.05 each | Brand logo on the box closure — feels intentional and premium |
| Insert with brand story | $0.05–$0.10 each | Short paragraph about what inspired the brand, your mission |
| Care instructions | $0.03–$0.08 each | Shows you care about how customers use the product long-term |
| QR code to welcome video | Free — just a printed QR | Links to a personal welcome from the founder, or usage tips |
| Recyclable or reusable message | Free — single line of text | "This box is made from recycled materials — please recycle again" |
How Startups Use Packaging as a Marketing Tool
| Brand | What They Did | The Result |
|---|---|---|
| Direct-to-consumer candle brand | Hand-written thank-you note in every box (first 500 orders) | 40+ Instagram posts from customers showing the note |
| Jewelry startup | Used branded tissue paper with a care instruction card | Customers described it as "feels like receiving a gift from a friend" |
| Organic snack brand | Printed a short founder story on the inside flap of the box | Customers said they felt connected to the brand's mission |
| Subscription box | Added a small zine about the month's theme | Subscribers shared the zine on social media, extending brand reach |
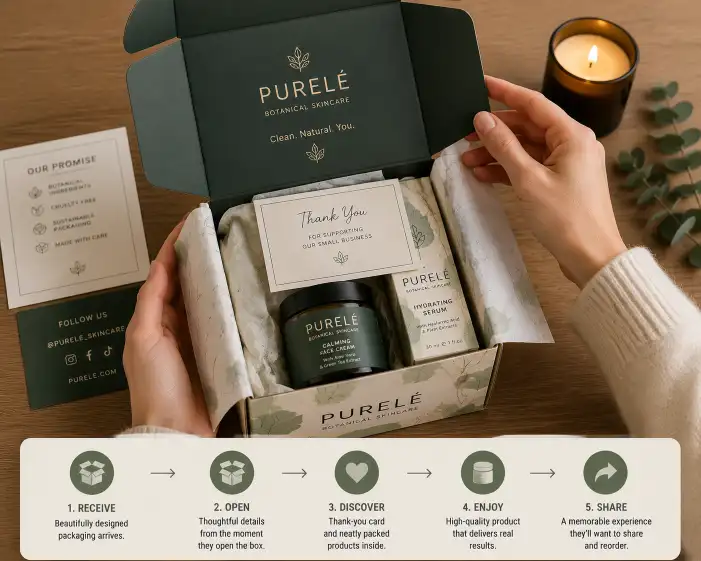
The Unboxing Experience Checklist
| Element | Why It Matters | Startup Implementation |
|---|---|---|
| First visual impression | Customer judges packaging in 0.5 seconds | Clean exterior with consistent brand colors |
| Opening feel | Smooth opening = quality signal | Box should open easily without tearing |
| Content reveal | Inside should feel intentional, not empty | Fill empty space with tissue paper or an insert |
| Product presentation | Product should be the hero | Simple insert or tray positions the product |
| Surprise element | Something extra = shareable moment | Thank-you card, sticker, or sample |
| Brand closure | Final takeaway = brand remembered | QR code, social handle, or referral code |
Scaling Packaging as Your Brand Grows
Your packaging should evolve as your brand moves from launch to growth to scale. Here is how to plan that evolution.
The Three-Stage Packaging Evolution
| Stage | Your Business Status | Packaging Strategy | Quantity Range | Box Type |
|---|---|---|---|---|
| Launch | First product, testing demand | Start simple, prove the concept, gather feedback | 200–500 units | Digital-printed folding carton |
| Growth | Consistent sales, repeat customers | Reduce per-unit cost, add quality upgrades | 1,000–3,000 units | Offset-printed folding carton with lamination |
| Scale | Multi-product, retail or wholesale | Full brand system, multiple SKUs, retail-ready | 3,000–10,000+ units | Mixed: premium folding cartons + rigid boxes |
Stage 1: Launch (First 0–6 Months)
Your goal at launch is not perfect packaging — it is good-enough packaging that lets you test the market.
| What to Do | Why |
|---|---|
| Order 300 standard folding cartons with digital printing | Lowest risk — if the product does not sell, you are not stuck with 5,000 boxes |
| Design with one color scheme that matches your brand | Consistent branding across products makes you look established |
| Skip custom dies and complex structures | Standard sizes work for 90% of products and save months of iteration |
| Order samples before production | A sample saves you from a costly mistake |
| Add one unboxing element | Thank-you card or tissue paper — creates shareable content |
| Collect customer feedback | Ask early buyers what they thought of the packaging |
Stage 2: Growth (6–18 Months)
When you reorder, that is the time to improve.
| What to Do | Why |
|---|---|
| Increase quantity to 1,000–2,000 units | Per-unit cost drops significantly when you move from digital to offset |
| Add lamination | Makes the box feel premium and protects during shipping |
| Upgrade one detail | Foil stamping, magnetic closure, or a custom insert |
| Standardize your box sizes | One box size across multiple products = simpler inventory |
| Create a packaging spec sheet | Formalize your requirements for easier quoting and reordering |
Stage 3: Scale (18+ Months)
At scale, packaging becomes a system, not a single box.
| What to Do | Why |
|---|---|
| Introduce rigid boxes for premium SKUs | Creates a tiered product line — standard and premium |
| Design for retail | Add barcodes, display-friendly boxes, wholesale packaging |
| Consolidate suppliers | Fewer suppliers = better pricing, easier quality control |
| Negotiate annual contracts | Lock in pricing based on projected annual volume |
| Build a packaging library | Standardized components across all products for efficiency |
Signals It Is Time to Upgrade Your Packaging
| Signal | What It Means | What to Do |
|---|---|---|
| You sold through your first 1,000 units | Market demand is proven — time to reduce per-unit cost | Switch from digital to offset printing |
| Customers are posting unboxing videos | Packaging is already a brand asset — amplify it | Add foil stamping or upgrade to a rigid box for your hero product |
| A retailer asks to stock your product | Retail requires different packaging (barcode, display-friendly) | Design retail-ready packaging before expanding to stores |
| You launched a second product | Time for brand consistency across SKUs | Standardize box sizes and design elements across all products |
| Reorder quantity exceeds 2,000 units | Volume justifies better box types | Consider rigid boxes for premium SKUs |
| Repeat purchase rate exceeds 20% | You have a loyal customer base — reward them | Invest in packaging that creates a shareable unboxing experience |
For more on scaling, see our custom packaging cost guide and wholesale custom boxes guide.
FAQ
How do I find a packaging supplier that accepts small orders?
Look for suppliers that specifically advertise "low MOQ," "small batch," or "startup-friendly" packaging. Online custom packaging platforms and small-batch specialists typically accept orders of 100–500 units. When contacting suppliers, ask directly: "What is your minimum order quantity for digital-printed folding cartons?" — this filters out large manufacturers immediately.
What if I have no design experience — can I still get custom packaging?
Yes. Many packaging suppliers offer design services starting at $100–$400 for a complete box design. Alternatively, you can use Canva or similar free tools to design the box face based on the supplier's die-line template. Most suppliers will also review your artwork for free and catch common print issues before production.
What is the easiest box type for a first-time founder?
A standard tuck-top folding carton with digital printing. It is the most forgiving box type for first orders — it ships flat, works with almost any product, requires no special assembly equipment, and is available at 200–500 unit MOQs. Most packaging suppliers can produce this box type, and the design process is straightforward.
How do I know if my artwork is print-ready?
Your artwork is print-ready when it meets these criteria: (1) CMYK color mode, not RGB, (2) 300 DPI resolution, (3) includes 3mm bleed on all sides, (4) all text and logos are at least 3mm inside the cut line (safe zone), (5) the file is saved as a high-resolution PDF. When in doubt, ask your supplier to review the file — reliable suppliers catch print issues before production.
Do I need a packaging sample? Is it worth the cost?
Yes — a pre-production sample is the most important investment in your first order. A sample typically costs $60–$250 and confirms that the box fits your product, the colors are accurate, and the quality meets your standards. Without a sample, you risk receiving boxes that do not fit, have wrong colors, or have structural defects. The sample cost is a fraction of a production mistake.
My supplier's MOQ is 3,000 — what do I do?
Move on. Many packaging factories set high MOQs because their production lines are designed for volume. You need a supplier that offers digital printing and accepts 200–500 unit orders. Search for "low MOQ packaging" or "small batch custom boxes." Online platforms and small-batch specialists are your best options for a first order.
How do I make my packaging look premium without spending more?
Use the "one premium detail" rule — choose one upgrade instead of spreading your budget across multiple features. The highest-impact upgrade for the lowest cost is matte lamination, which transforms a basic folding carton into packaging that looks and feels significantly more premium. A custom thank-you card or branded tissue paper adds unboxing value at minimal cost.
Should I include inserts in my first packaging order?
Only if your product needs protection during shipping. If your product is fragile (electronics, glass bottles, ceramics), a foam or paperboard insert is necessary. For non-fragile products (candles, apparel, dry goods, boxes that fit snugly), you can skip inserts on the first order and add them later. Inserts add cost and complexity — add them when your budget and order volume allow.
How long does it take to get custom packaging for the first time?
Plan for 8–10 weeks from first contact to receiving boxes. This breaks down as: 1 week for quoting and supplier selection, 2–3 weeks for die-line and artwork, 1–2 weeks for sample production and approval, 2–3 weeks for production, and 1–2 weeks for shipping (air freight). Rush orders are sometimes possible in 3–4 weeks with expedited shipping, but expect premium pricing.
What happens after my first batch sells out?
When you reorder, you have options: reorder the same packaging at the same quantity, increase quantity to reduce per-unit cost (moving from digital to offset printing can cut costs significantly), or upgrade to better packaging (add lamination, upgrade box type, add inserts). Plan your reorder 8–10 weeks before you expect to run out, and use the opportunity to improve your packaging.

