Struggling to visualize the complex journey of a custom rigid box? This uncertainty can lead to costly mistakes. Let me walk you through the entire process, from a simple idea to the final product.
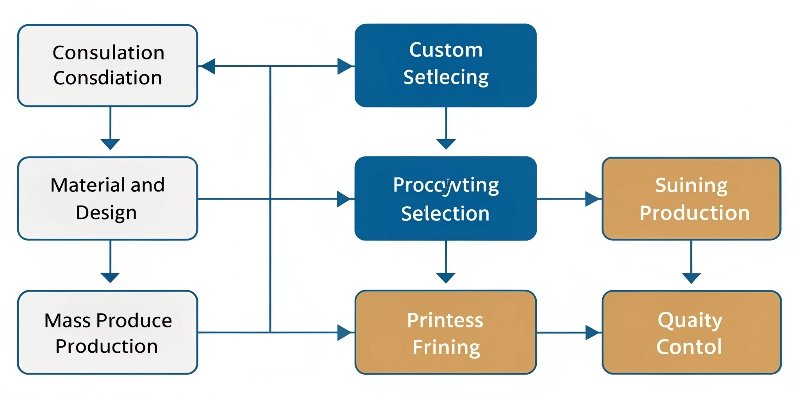
The custom rigid box process involves several key stages. It begins with consultation and design, then moves to material selection and prototyping. After approval, it goes into mass production, including printing, surface finishing, assembly, and finally, rigorous quality control before shipping. This ensures a premium result.

I've been in the packaging industry for over 16 years, and I’ve seen it all. A clear roadmap is the secret to a successful project. It prevents headaches and ensures the final box is exactly what you envisioned. Let's break down this journey together, so you can navigate it with confidence.
What is rigid box packaging?
Unsure what makes rigid box packaging so special? You could be missing out on a powerful way to boost your brand’s value. Let’s explore what defines this premium packaging choice.
Rigid box packaging, often called a set-up box, is a type of sturdy packaging made from thick, condensed paperboard. Unlike folding cartons, it doesn't collapse. It is delivered fully assembled, offering superior protection and a luxurious feel for high-end products like electronics or jewelry.

When people ask me to explain rigid boxes, I often use the iPhone box as a perfect example. It’s heavy, strong, and feels valuable even before you see the phone. The core of these boxes is a material called greyboard or chipboard, which is much thicker and denser than the paperboard used for a standard cereal box. This solid core is then wrapped with a finishing paper. This paper can be anything from standard art paper to a special textured or colored paper that reflects the brand identity.
I remember a client who was launching a new line of organic skincare. They were undecided between a folding carton and a rigid box. We made a prototype of each. The moment they held the rigid box, their decision was made. The weight and sturdiness instantly communicated the quality and luxury they wanted their brand to stand for. That’s the power of this packaging type. It’s not just a container; it’s the first part of the product experience.
Here’s a simple breakdown of the key differences:
Key Differences: Rigid Box vs. Folding Carton
| Feature | Rigid Box | Folding Carton |
|---|---|---|
| Core Material | Thick paperboard (1-3mm thick) | Thin paperboard (under 1mm thick) |
| Structure | Solid, does not collapse | Ships flat, needs assembly |
| Perceived Value | High, associated with luxury | Standard, used for everyday retail |
| Best For | Electronics, jewelry, cosmetics, gifts | Food, pharmaceuticals, smaller goods |
How to make packaging step by step?
Overwhelmed by all the steps involved in creating packaging? Missing just one can derail your timeline and budget. Here is a clear, step-by-step guide to the general process.
The process starts by defining your product needs and budget. Then, you move to structural and graphic design, select materials, and create a physical prototype. After approval, mass production begins, followed by assembly, quality checks, and finally, shipping the finished packaging to you.

At Giftspack, we follow a process that has been refined over many years. It ensures that nothing falls through the cracks and the client is involved at every critical stage. For a designer like Peter, understanding this workflow is key to collaborating effectively with a manufacturer.
Step 1: Consultation and Discovery
This is the most important step. We need to understand everything: the product it will hold, the target customer, the brand's story, and the budget. I always tell my team, "Listen more than you talk." We need to get inside the client's head to understand their vision and functional requirements, like how much protection the product needs.
Step 2: Design and Engineering
Once we have the brief, the design phase begins. This has two parts. First is the structural design, which is like the architecture of the box. How will it open? Does it need an insert? Second is the graphic design, which is the visual identity. This includes the colors, logo, and any text. We create a digital file, often called a dieline, that serves as the blueprint for production.
Step 3: Prototyping and Sampling
Never skip this step. We create a physical sample based on the design. This allows you to see and feel the box, check the colors, and test if your product fits perfectly. I once had a client who wanted to save money by skipping the prototype. The final boxes arrived, and the product fit was too tight. That small saving ended up costing them much more in the long run. A prototype confirms everything before you commit to thousands of units.
Step 4: Production and Quality Control
After you approve the sample, we start mass production. This involves printing the wrap papers, cutting the greyboard, and assembling the boxes. Quality control isn't just a final step; it happens throughout the process. We check the print quality, the cutting accuracy, and the final assembly to ensure every box meets our high standards.
How to make rigid packaging?
Curious about the specific craftsmanship behind a premium rigid box? Not knowing the process can make it hard to explain your design ideas. Let me show you how these beautiful boxes are actually made.
Making a rigid box involves precisely cutting and grooving a thick paperboard to form its core structure. A separate thin wrapper is printed and finished. This wrapper is then carefully glued and applied to the paperboard, creating a seamless, high-end box with sharp, clean edges.

The production of a rigid box is a fantastic mix of machine precision and skilled handiwork. It's more complex than making a simple folding carton, which is why it has such a premium feel. We break it down into a few key stages.
The Core Structure: Greyboard Processing
Everything starts with the thick greyboard. We cut it to the exact size for the base and lid. For high-end boxes with perfectly sharp 90-degree corners, we use a machine to cut V-shaped grooves into the board. When the sides are folded up, these grooves create crisp edges that look incredibly clean. The sides are then taped together to form a sturdy tray.
The Exterior: Wrap Printing and Finishing
While the core is being made, we work on the outer wrap. This is usually a thinner paper that gets printed with the brand’s graphics. After printing, we can add special finishes. This could be a matte or gloss lamination for protection, a spot UV to make certain areas shiny, or hot stamping with metallic foil. These finishes add to the luxury feel.
The Assembly: Bringing It Together
This is where the magic happens. We use an automated machine that applies glue to the back of the printed wrap. The greyboard tray is then precisely placed onto the glued wrap. The machine folds the wrap up and over the sides of the tray, tucking the edges inside for a seamless finish. Great precision is needed here. I remember a project with a heavily textured wrap paper. We spent half a day adjusting our machine's pressure and speed to ensure the paper wrapped perfectly without tearing or creating air bubbles.
| Manufacturing Stage | Description | Key Goal |
|---|---|---|
| 1. Board Cutting | Cutting and grooving thick greyboard. | Create the box's frame. |
| 2. Wrap Printing | Printing graphics and applying finishes to paper. | Create the box's skin. |
| 3. Assembly | Gluing the wrap and applying it to the board frame. | A perfect, seamless fit. |
| 4. QC & Packing | Inspecting each box for flaws before shipping. | Ensure top quality. |
What are custom packaging boxes?
Think "custom" packaging just means adding your logo to a standard box? This narrow view limits your ability to create a truly memorable unboxing experience. Let's explore what "custom" really means.
Custom packaging boxes are containers designed and produced entirely around your product and brand. This customization includes specific dimensions, unique structural designs, specially chosen materials, and exclusive printing and finishing techniques. It’s about creating a perfect fit and a unique brand story.

In my 16 years of experience, "custom" means a box is made from scratch for one specific purpose. It’s the difference between buying a suit off the rack and getting one tailored. Both work, but only one fits you perfectly. For a product designer like Peter, understanding the full scope of customization is crucial for balancing cost and aesthetics while creating something truly unique.
Customization in Size and Structure
This is the most basic level of customization, but it goes beyond simple length, width, and height. It's about creating a structure that interacts with the product. Does it need a custom-molded insert to hold multiple items securely? Maybe a box with a unique trapezoid shape? We once designed a box for a premium pen a few years ago. Instead of a simple lift-off lid, we engineered a drawer-style box with a ribbon pull-tab. The sliding motion made the unboxing feel more like a ceremony. That's structural customization.
Customization in Materials and Finishes
Here, you can really make your brand stand out. You can choose the exact thickness of the board, the texture of the wrap paper—maybe something that feels like linen or soft leather. We can use soft-touch lamination, which feels velvety and luxurious. We can also incorporate sustainable materials like FSC-certified paper or use soy-based inks. The choice of material and finish directly communicates brand values, whether it's luxury, eco-friendliness, or minimalism.
Customization in Branding and Graphics
This is about telling your story visually. True customization uses every surface. We can print on the inside of the box to surprise the customer. We can use embossing to raise your logo, or debossing to press it in. It's about coordinating every graphical element with your overall brand identity. The goal is to create an experience so memorable that the customer feels like the packaging itself is part of the gift.
Conclusion
From the first idea to the final product, the custom rigid box process is a detailed journey. Understanding each step helps you create packaging that perfectly protects and elevates your product.


