Starting a custom book-style box project can feel overwhelming. So many details, where do you even begin? I'll guide you through the first essential steps to get it right.
To start customizing a book-style rigid box, begin by defining your product's dimensions, weight, and protection needs. Then, clarify your brand's aesthetic goals and budget. Finally, prepare your artwork files and consult with an experienced packaging manufacturer to translate your vision into reality.

Getting started is often the hardest part. You have the vision, but turning it into a tangible box involves a clear, structured process. I've been doing this for over 16 years, and I've learned that a solid foundation is key. You need a clear plan to make sure your project is a success from the very beginning. Let's break down exactly what you need to do, step by step, so you can move forward with confidence and create packaging that truly represents your brand.
How to make rigid packaging?
Your product deserves premium packaging, but creating a rigid box seems complex. Concerned about the technical steps? I'll simplify the entire manufacturing process for you, from start to finish.
Making rigid packaging involves precise steps. First, the greyboard is cut and grooved to form the box's core structure. Then, a printed art paper wrap is laminated onto the board. Finally, the box is formed, glued, and assembled, often with added elements like magnets or ribbons.

The process of making rigid packaging is a craft that blends precision machinery with skilled handwork. I remember a project for a luxury watch brand where the sharpness of the corners was everything. The client insisted on perfectly square, 90-degree edges to match their product's modern aesthetic. We achieved this using a technique called V-grooving, where a V-shaped channel is cut into the greyboard. This lets the board fold into a sharp, clean edge without any rounding. A slight error in the groove's depth or angle would have ruined the effect and cheapened the feel. It’s this attention to detail during the manufacturing stages that transforms simple materials into a premium experience. Here’s a breakdown of the core manufacturing journey your box will take.
Key Manufacturing Stages
| Stage | Action | Why It's Important |
|---|---|---|
| Material Cutting | Large sheets of greyboard and paper wrap are cut to size. | Accuracy here prevents waste and ensures all components fit together perfectly. |
| Grooving/Scoring | The greyboard is grooved to create folding lines. | V-grooving creates sharp, luxurious corners essential for high-end boxes. |
| Wrapping & Laminating | The printed paper wrap is glued and applied to the greyboard. | This step applies your branding and graphics to the box's structure. |
| Box Forming | The wrapped board is folded and glued into its final 3D shape. | This is where the box truly takes form and its strength is established. |
| Finishing | Extras like magnets, ribbons, or inserts are added. | These details enhance the unboxing experience and add functionality. |
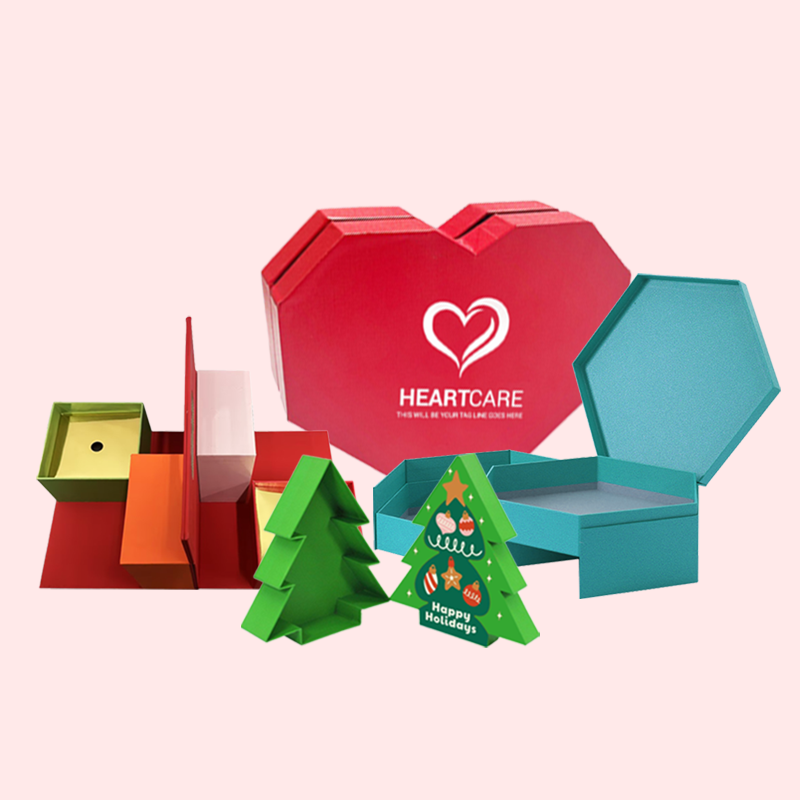
What are the components of a rigid box?
Thinking about a rigid box but unsure what exactly it's made of? The different layers and parts can be confusing. Let's break down the anatomy of a box.
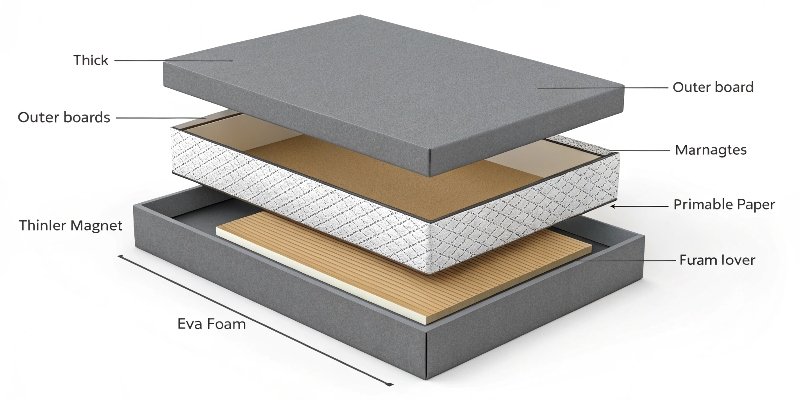
A rigid box has two primary components: the inner structural board, usually a thick greyboard1, and the outer wrap, which is a thinner, printable paper. Additional components can include magnets for closure, EVA foam2 or paper inserts for support, and ribbons for pulling or decoration.

Think of building a rigid box like building a house. Each component has a specific job, and they all work together to create the final structure. The greyboard1 is the foundation and frame, providing all the strength. The paper wrap is the exterior siding and paint, delivering the visual appeal. And the inserts are like custom-built furniture, designed to hold everything inside perfectly. A few years ago, we worked on a project for a boutique spirits company. They wanted a magnetic closure3 for their book-style box. The magnets we chose were small, but they were powerful neodymium magnets. We carefully embedded them within the greyboard1 layers so they were completely hidden, creating a seamless look and a satisfying "snap" when the box closed. This small detail made a huge difference in the customer's premium perception.
The Anatomy of a Rigid Box
| Component | Common Material | Main Purpose |
|---|---|---|
| Structural Board | Greyboard (800gsm - 1500gsm) | Provides the foundational strength and rigidity. The core of the box. |
| Outer Wrap | Art Paper, Kraft Paper, Specialty Paper | Carries the printed graphics, branding, and finish (e.g., matte or gloss). |
| Liner | Same as outer wrap, or a different color | Covers the inside surfaces of the box for a complete, finished look. |
| Insert / Inlay | EVA Foam, Cardboard, Molded Pulp | Secures the product inside the box, preventing movement and damage. |
| Closure | Magnets, Ribbon Tie, Sleeve | Keeps the box securely closed and enhances the unboxing experience4. |
How to make a box rigid?
Want your packaging to feel strong and luxurious? A flimsy box just won't do. The secret to that sturdy, premium feel is in the materials and construction methods.
The rigidity of a box comes from its core material, which is a dense, non-bending paperboard called greyboard1. The thickness of this board, measured in grams per square meter (GSM), directly determines how strong and unyielding the final box will be. Construction techniques also add strength.

The foundation of a strong box is always the greyboard1. Its thickness, or caliper, is the single most important factor for rigidity. I had a client who wanted to package a heavy glass candle. They initially wanted to use a thinner, 1000gsm board to save on costs. I knew this wouldn't be enough to support the weight and would feel inadequate to the customer. So, my team created two prototypes: one with the 1000gsm board and another with a sturdier 1200gsm board. When the client held them, the difference was immediate. The thinner box flexed slightly under the candle's weight, while the thicker one felt solid and protective. They understood instantly that the small extra cost for the thicker board was a crucial investment in their brand's quality perception. It’s not just about protection; it's about communicating value from the very first touch.
Choosing the Right Board Thickness
| Product Example | Recommended GSM | Reason |
|---|---|---|
| Jewelry, Small Cosmetics | 800gsm - 1000gsm | The product is light, so the focus is on a delicate yet firm feel. |
| Smartphones, Electronics | 1000gsm - 1200gsm | Needs good protection for a moderately heavy and fragile item. |
| Glass Bottles, Luxury Goods | 1200gsm - 1500gsm+ | The product is heavy and requires maximum structural integrity to prevent damage. |
What is the process of making boxes?
Ever wonder how a simple sheet of paper becomes a beautiful box? The journey from a design file to a finished product involves many precise steps that all need to work together.
The box-making process begins with understanding the client's needs, followed by structural and graphic design. After design approval, we create a prototype. Then, mass production starts: printing the wraps, cutting and grooving the boards, wrapping, assembling, and finally, conducting quality control5 before shipping.

Seeing a project through from an idea to thousands of finished boxes is a detailed process. For a designer, understanding this workflow is key to managing timelines and expectations. A major step that can save a lot of headaches is prototyping6. I remember a large project for a consumer electronics brand where the client was ready to approve the design and go straight to production. The digital proof looked perfect. However, I insisted we create a physical prototype first. When we assembled the sample, we discovered the die-cut for the foam insert was just 2mm too tight, making it difficult to remove the product. Catching this at the prototype stage saved them from producing 50,000 boxes that would have led to customer complaints. This is why following a structured process is not just about efficiency; it's about guaranteeing a perfect final product.
From Concept to Completion: The Project Workflow
| Process Stage | Key Activities | Typical Duration |
|---|---|---|
| 1. Consultation & Quoting | We discuss your specs, materials, quantity, and goals. | 1-3 Business Days |
| 2. Design & Dieline | Your designer creates the artwork on our structural template (dieline7). | 3-5 Business Days |
| 3. Prototyping | We create a physical, unprinted or printed sample for your approval. | 5-7 Business Days |
| 4. Mass Production | We print, cut, wrap, and assemble all the boxes. | 15-25 Business Days |
| 5. Quality Control & Shipping | Each box is checked, packed, and shipped to you. | 5-7 Business Days |
Conclusion
Starting your custom box project is about defining your needs, understanding the components, and partnering with an expert. Follow these steps, and you'll create packaging that impresses your customers.
-
Explore the properties of greyboard to understand its importance in creating sturdy packaging. ↩ ↩ ↩ ↩ ↩
-
Discover how EVA foam provides protection and support for products inside boxes. ↩
-
Learn about the benefits of magnetic closures for enhancing the unboxing experience. ↩
-
Learn strategies to create memorable unboxing experiences that delight customers. ↩
-
Discover how quality control ensures the reliability and appeal of packaging. ↩
-
Find out how prototyping can save time and costs in the packaging production process. ↩
-
Understand the significance of dielines in creating accurate packaging designs. ↩