
Struggling with the custom packaging process? It feels complex, and missing one step can cause big delays. But it's actually a clear path from idea to final product.
Ordering custom packaging involves defining your needs, designing the structure and graphics, getting a quote, approving a sample, and then moving to mass production and delivery. It's a collaborative journey1 with your supplier.

As a designer like Peter, you probably know some of these stages. But understanding how they connect from a supplier's view can make your projects much smoother. In my 16 years in this business, I've learned that a clear process is the key to avoiding headaches for everyone involved. Let's break down each part of this journey to make sure your next project goes perfectly.
What does custom packaging2 mean?
Heard the term 'custom packaging' and thought it sounded complicated? You might think it's just for big brands. It simply means packaging designed specifically for your product's needs.
Custom packaging is a box or container made to your product's exact size, shape, and branding. Unlike stock packaging, it's not a one-size-fits-all solution. It's tailored to protect your item perfectly and represent your brand identity.

To put it simply, custom packaging is made just for you. Think about the paper boxes you see every day for cosmetics or electronics. Those were not picked off a shelf; they were designed around that specific product. The main reason brands choose custom is to create a unique experience3. When a customer unboxes your product, the packaging is the first thing they touch and see. It has to feel right. For example, we work with many cosmetic brands that need a box that not only looks good but also holds their specific bottle shape securely. A stock box just can't do that. It is all about making the packaging an extension of the product itself.
| Feature | Stock Packaging | Custom Packaging |
|---|---|---|
| Fit | General, one-size-fits-many | Precise, made for your product |
| Branding | Limited or no branding | Full branding and graphic design4 |
| Protection | Basic, may need extra filler | Optimized for protection |
| Brand Experience | Generic, forgettable | Unique, memorable |
| Minimum Order | Very low | Higher, depends on supplier |
What are the 7 basic steps to packaging design5?
Have a great idea but don't know where to start? A blank canvas can be intimidating. Here are the seven essential steps that turn your creative vision into a real design.
The 7 steps are: defining requirements, understanding your brand, researching competitors, designing the structure6, creating the graphics, choosing materials and finishes7, and finally, preparing the dieline file8 for production. Each step builds on the last.
[^5]](http://gifts-pack.com/wp-content/uploads/2025/07/the-7-steps-are-defining-requireme.jpg "7 Steps of Packaging Design")
This 7-step process is a roadmap I've refined over my years at Giftspack. It ensures nothing gets missed. As a designer, Peter would find this structure familiar, but let's look at it from a manufacturer's perspective.
Step 1: Define Requirements
This is the brief. What product is it for? What are its dimensions and weight? How will it be shipped? A strong start here prevents most problems later.
Step 2: Understand Your Brand & Customer
Who are you selling to? What is your brand's personality? The design for a luxury cosmetic must feel different from a playful children's toy.
Step 3: Research
Look at what your competitors are doing. What works? What doesn't? This helps you find a unique space on the shelf.
Step 4: Structural Design
This is where we build the box's blueprint. We think about inserts, windows, and how it opens. This is engineering.
Step 5: Graphic Design
Now we add the personality. Logos, colors, and text are applied to the structure. This is the art.
Step 6: Choose Materials & Finishes
Will it be thick cardstock? Kraft paper? Will it have a glossy or matte finish? These choices affect cost and feel.
Step 7: Prepare Production Files
The final step is creating the technical dieline file8 for the factory. This file tells our machines exactly where to cut and fold.
How to make packaging step by step?
Your design is approved, but what happens next? The factory process can feel like a mystery. Let me show you how your file becomes a physical box in our facility.
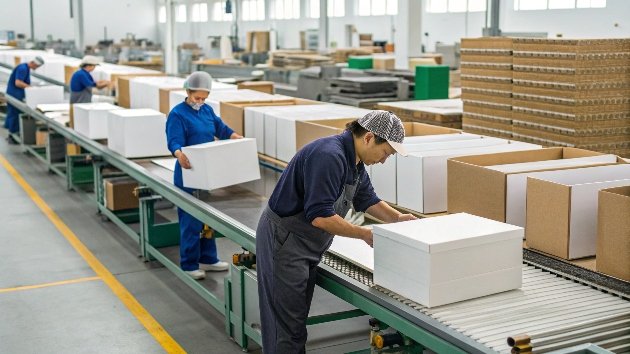
Making the box involves several key stages: pre-press checks9, creating printing plates10, printing the sheets, applying finishes like lamination, die-cutting11 the shape, folding and gluing, and finally, quality control12. It's a precise manufacturing process.

Once your design files arrive, our production team takes over. It's a process I love watching because it brings ideas to life. First, our pre-press team checks your files for any technical issues. Then, we move to the physical stages.
Pre-Press and Platemaking
We double-check all colors and layouts. Then we create printing plates10, which are like giant, detailed stamps for each color in your design.
Printing
Large sheets of your chosen paper stock are fed through massive offset printing presses. Each plate applies one color until your full design is printed on the sheet.
Finishing
This is where we add special touches. We can add a plastic film (lamination) to make the box more durable and water-resistant. Or we can add spot UV or foil stamping for a premium look.
Die-Cutting and Creasing
The printed sheets go to a die-cutting machine. Think of it like a giant, very precise cookie-cutter. A "die" cuts out the box shape and presses creases where the folds will be.
Folding and Gluing
The flat, cut-out sheets are now folded and glued by a machine into their final 3D box shape.
Quality Control
Before packing, our team inspects the boxes to ensure they meet the approved sample's quality.
What are the steps in packaging?
You know the design and production parts, but what about the whole project? Managing every stage can be tough. Let's look at the complete client-supplier journey13 from start to finish.
The key steps in a packaging project include the initial consultation and quote, design and sample approval, placing the formal order with a deposit, mass production14, final quality inspection, final payment, and finally, shipping and logistics15.

From my experience, a successful project is all about clear communication between the client and the supplier at every stage. It's a partnership. I always tell my clients, like Peter, that understanding this whole flow makes their job easier because they know what to expect and when. It removes surprises. The journey isn't just about making a box; it's about managing a project from a simple idea to a product ready to ship. I’ve found that laying out the responsibilities helps keep things on track, on time, and on budget. Here is a simple breakdown of the whole process.
| Step | Key Action | Main Responsibility |
|---|---|---|
| 1. Consultation & Quote | You share your needs; we provide a price estimate. | Both Client & Supplier |
| 2. Design & Sampling | We create a physical sample for you to approve. | Supplier (with Client feedback) |
| 3. Formal Order | You place the order and pay a deposit. | Client |
| 4. Mass Production | We manufacture your full order of boxes. | Supplier |
| 5. Quality & Payment | We conduct a final check; you complete the payment. | Both Client & Supplier |
| 6. Shipping | We pack and ship the boxes to your location. | Supplier |
Conclusion
Ordering custom packaging is a clear, collaborative process. By understanding each step, from design to delivery, you can ensure your project is a success and your brand truly shines.
-
Understanding the collaborative journey can improve communication and project outcomes. ↩
-
Explore this resource to understand the nuances of custom packaging and its benefits for your brand. ↩
-
Discover the significance of unique packaging experiences in enhancing customer satisfaction. ↩
-
Discover how graphic design can elevate your packaging and create a memorable brand experience. ↩
-
Learn about effective packaging design strategies that can enhance your product's appeal and marketability. ↩
-
This link will provide insights into the structural design process, crucial for effective packaging. ↩
-
Find out about the various materials and finishes that can enhance your packaging's durability and aesthetics. ↩
-
Understanding dieline files is essential for successful production; explore this resource for clarity. ↩ ↩
-
Learn about the importance of pre-press checks to ensure quality in your packaging production. ↩
-
This resource will explain the process of creating printing plates, a key step in packaging production. ↩ ↩
-
Explore die-cutting techniques to understand how your packaging gets its unique shapes. ↩
-
Quality control is vital for ensuring product standards; learn more about its importance in packaging. ↩
-
Understanding the client-supplier journey can enhance collaboration and project success. ↩
-
This link will provide insights into the mass production process, crucial for scaling your packaging. ↩
-
Learn about effective shipping and logistics strategies to ensure timely delivery of your packaging. ↩


